Serial NO. : H01117016-EN
Date of Editing: 2016-06-21
Index :
2.AR-727-CM converter configuration steps
2-2.Access HTTP Server web page to configure IP
3.Configuration steps for E-series Controller.
When devices need to connect to a network, the first three digits (network portion) of the IP addresses in the local network environment must be the same. This is done to ensure that the devices are in the same network, enabling smooth connectivity and data exchange.
For example, let's say you have a device with the IP address 192.168.1.127, and the local environment (computer) has the IP address 192.168.1.8. The first three digits (192.168.1) of these two IP addresses are the same, indicating that they are in the same network and can communicate with each other. However, if the first three digits are different, it means that the devices are in different networks, and direct communication between them will not be possible.
1.Verify computer IP.
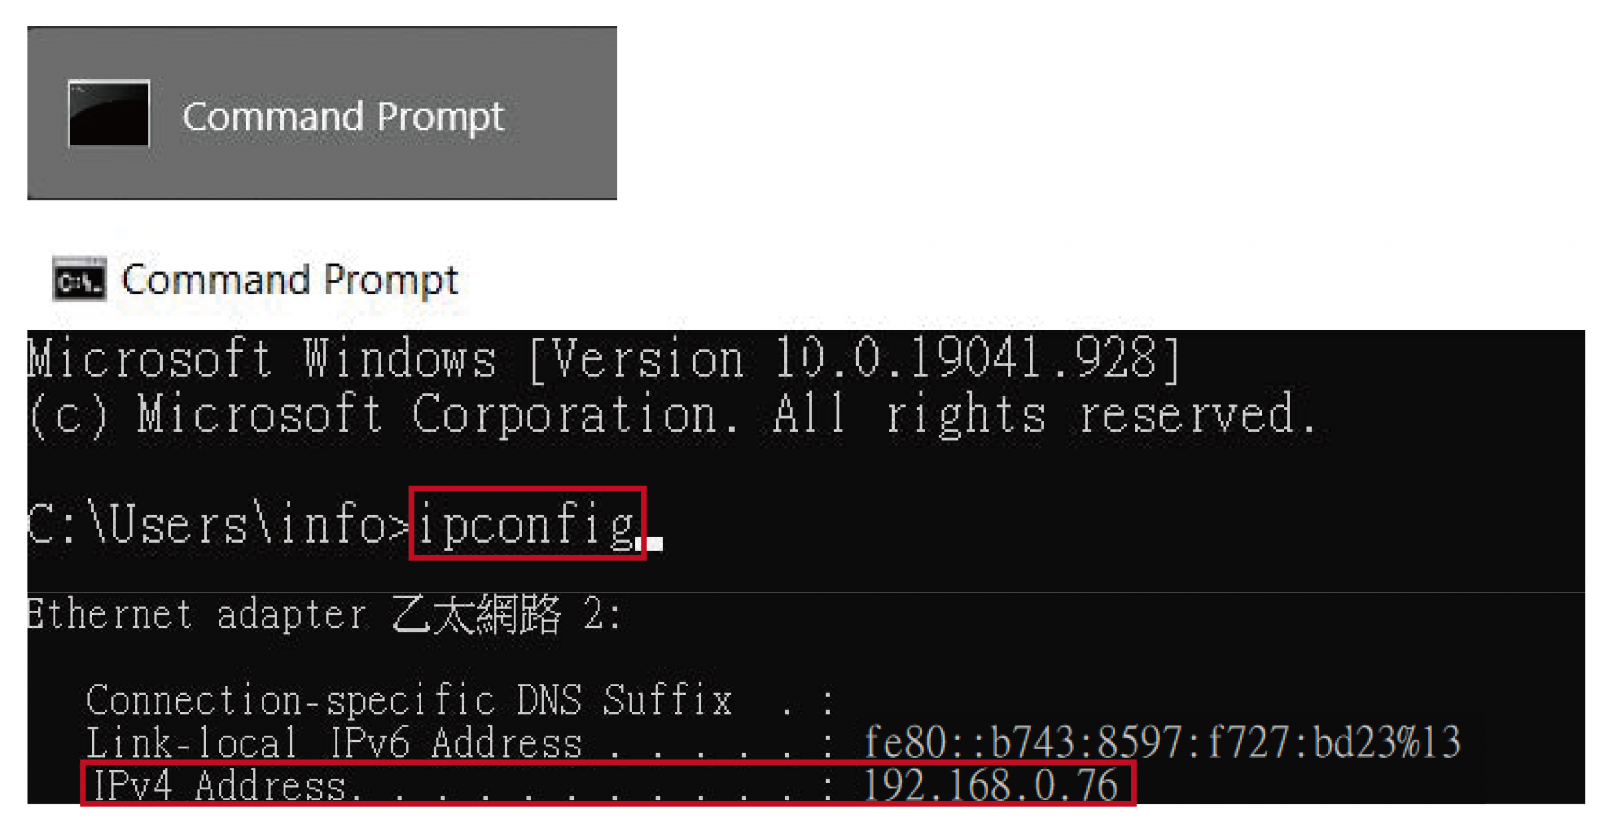
Search for [Command Prompt]Enter [ipconfig]
IPv4 Address is your PC's IP address. In this example, 192.168.0.76 is the IP Address
2.AR-727-CM converter configuration steps
Determine whether the IP Addresses’ are consistent
(AR-727-CM default IP is 192.168.1.127)
- Example 1: PC IP is 192.168.0.XXX, and then the IP Address are inconsistent. → Please start from Verify computer IP
- Example 2: PC IP is 192.168.1.XXX, and then the IP Address are consistent. → Please start from Access HTTP Server web page to configure IP.
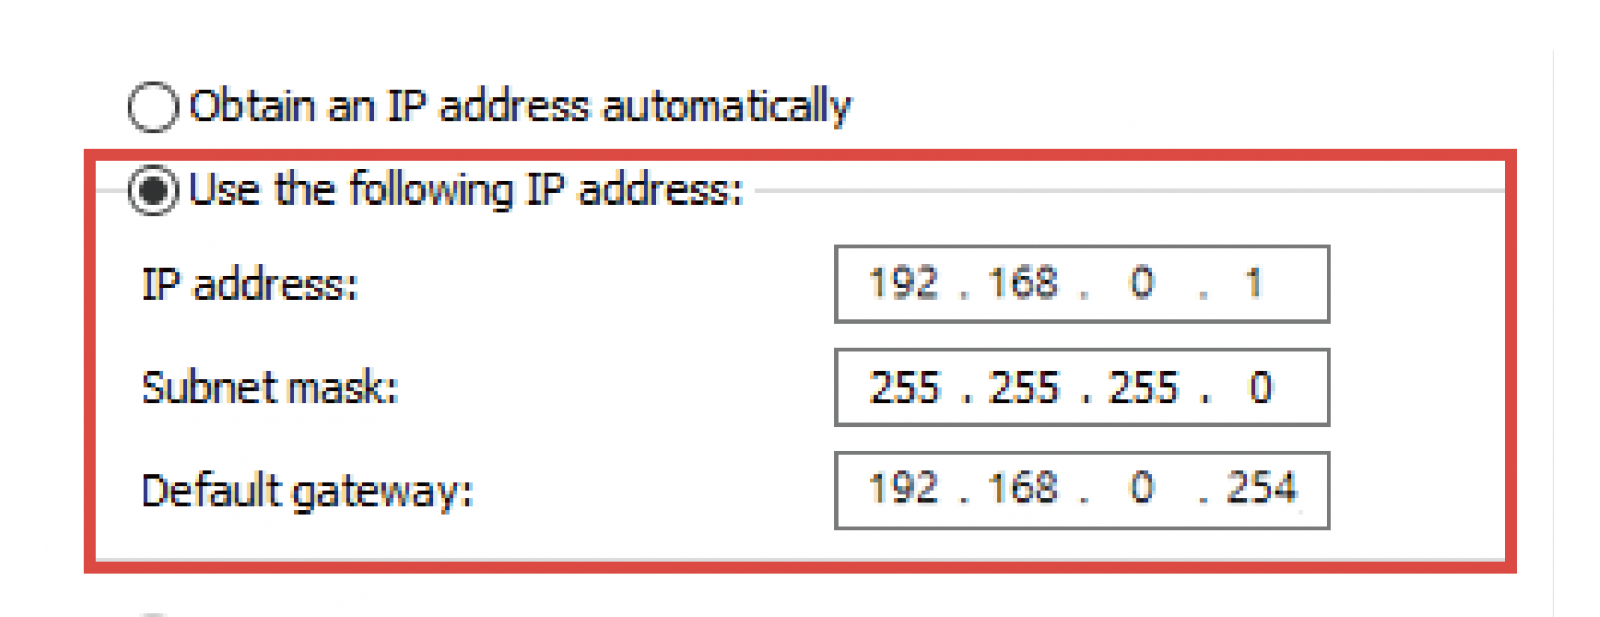
2-1.Verify computer IP
Modify the Verify computer IP Address to match the AR-727-CM IP Address
Firstly, we need to modify the PC IP from 192.168.0.XXX to 192.168.1.XXX to control AR-727-CM, the institution is as below:
(Additional Information: Subnet Mask 255.255.255.0 means the fourth number of IP range is changeable from 1~255)

※ The purpose of the modification is to establish a temporary connection with the converter. Change the converter's IP to match the network segment of the future computer to be used.
2-2.Access HTTP Server web page to configure IP
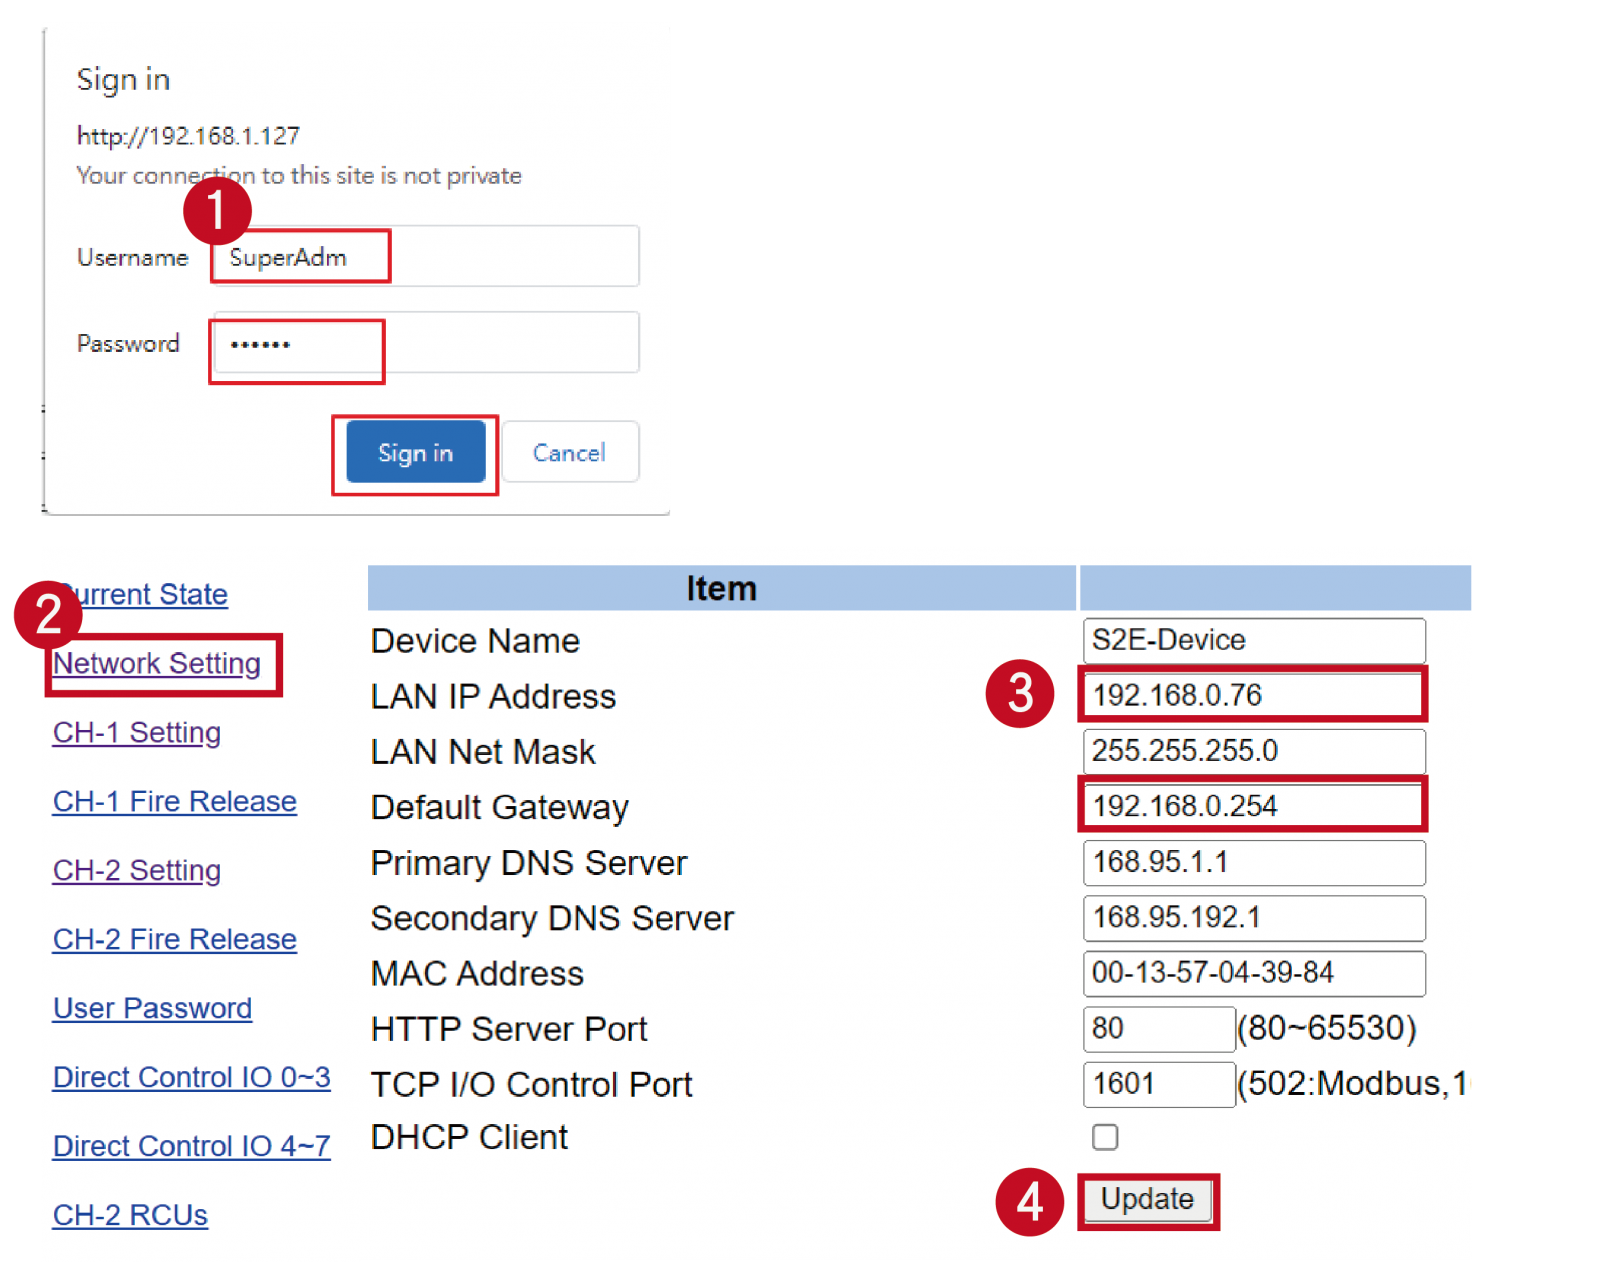
Open a browser and enter the default IP address of AR-727-CM (e.g., 192.168.1.127) to access the web interface. Locate the IP address field and change the first three digits of the IP to match the computer's network segment IP (e.g., 192.168.0.XXX). Then click "Update".
(Note: XXX should be entered by yourself and can range from 0 to 254.)
※ Modify the PC IP back to the default value, ignoring this step if you did not change the PC IP
3.Configuration steps for E-series Controller.
Verify that the first three digits of the IP address in the local environment match the controller's IP. You can directly modify the IP of the controller by entering commands.
Keypad Controller (AR-725-E/AR-331-E):
| Function | Command | Exposition |
| IP Address assign (Must Power reset) | 01*0*CCCCCCCCCCCC# | default value = 192.168.1.127 CCCCCCCCCCCC = 192168001127 If set to 000.000.000.000 will enable DHCP otherwise will disable DHCP |
LCD Controller (AR-837-E/EF/EL/ER/EA/W):

4.Checklist for Inspection
| Confirmation | Item | Check Content |
| ☐ | 1. | Check if the first three digits of the IP address in the local network environment match the device. |
| ☐ | 2. | Modifying the first three digits aims to establish a temporary connection with the converter by changing its IP to match the future computer's network segment. |
| ☐ | 3. | After modifying the IP of the converter device, remember to change the computer's IP back to its original settings. |